1. Log in to app.connectionincorporated.com
2. In the navigation bar on the left-hand side, select Contacts > Contacts/ Smart Lists
3. Use the Import Contacts that the blue arrow is pointing to

4. Upload your CSV database where it says "Upload A File"

5. Confirm your file has been uploaded by locating the name of your database
6. Next

7. Map the fields. Confirm everything you have under "Column Header From File" matches "Contact Fields." If it doesn't automatically populate, you will need to manually select it.
8. This will only work if it's a text field.
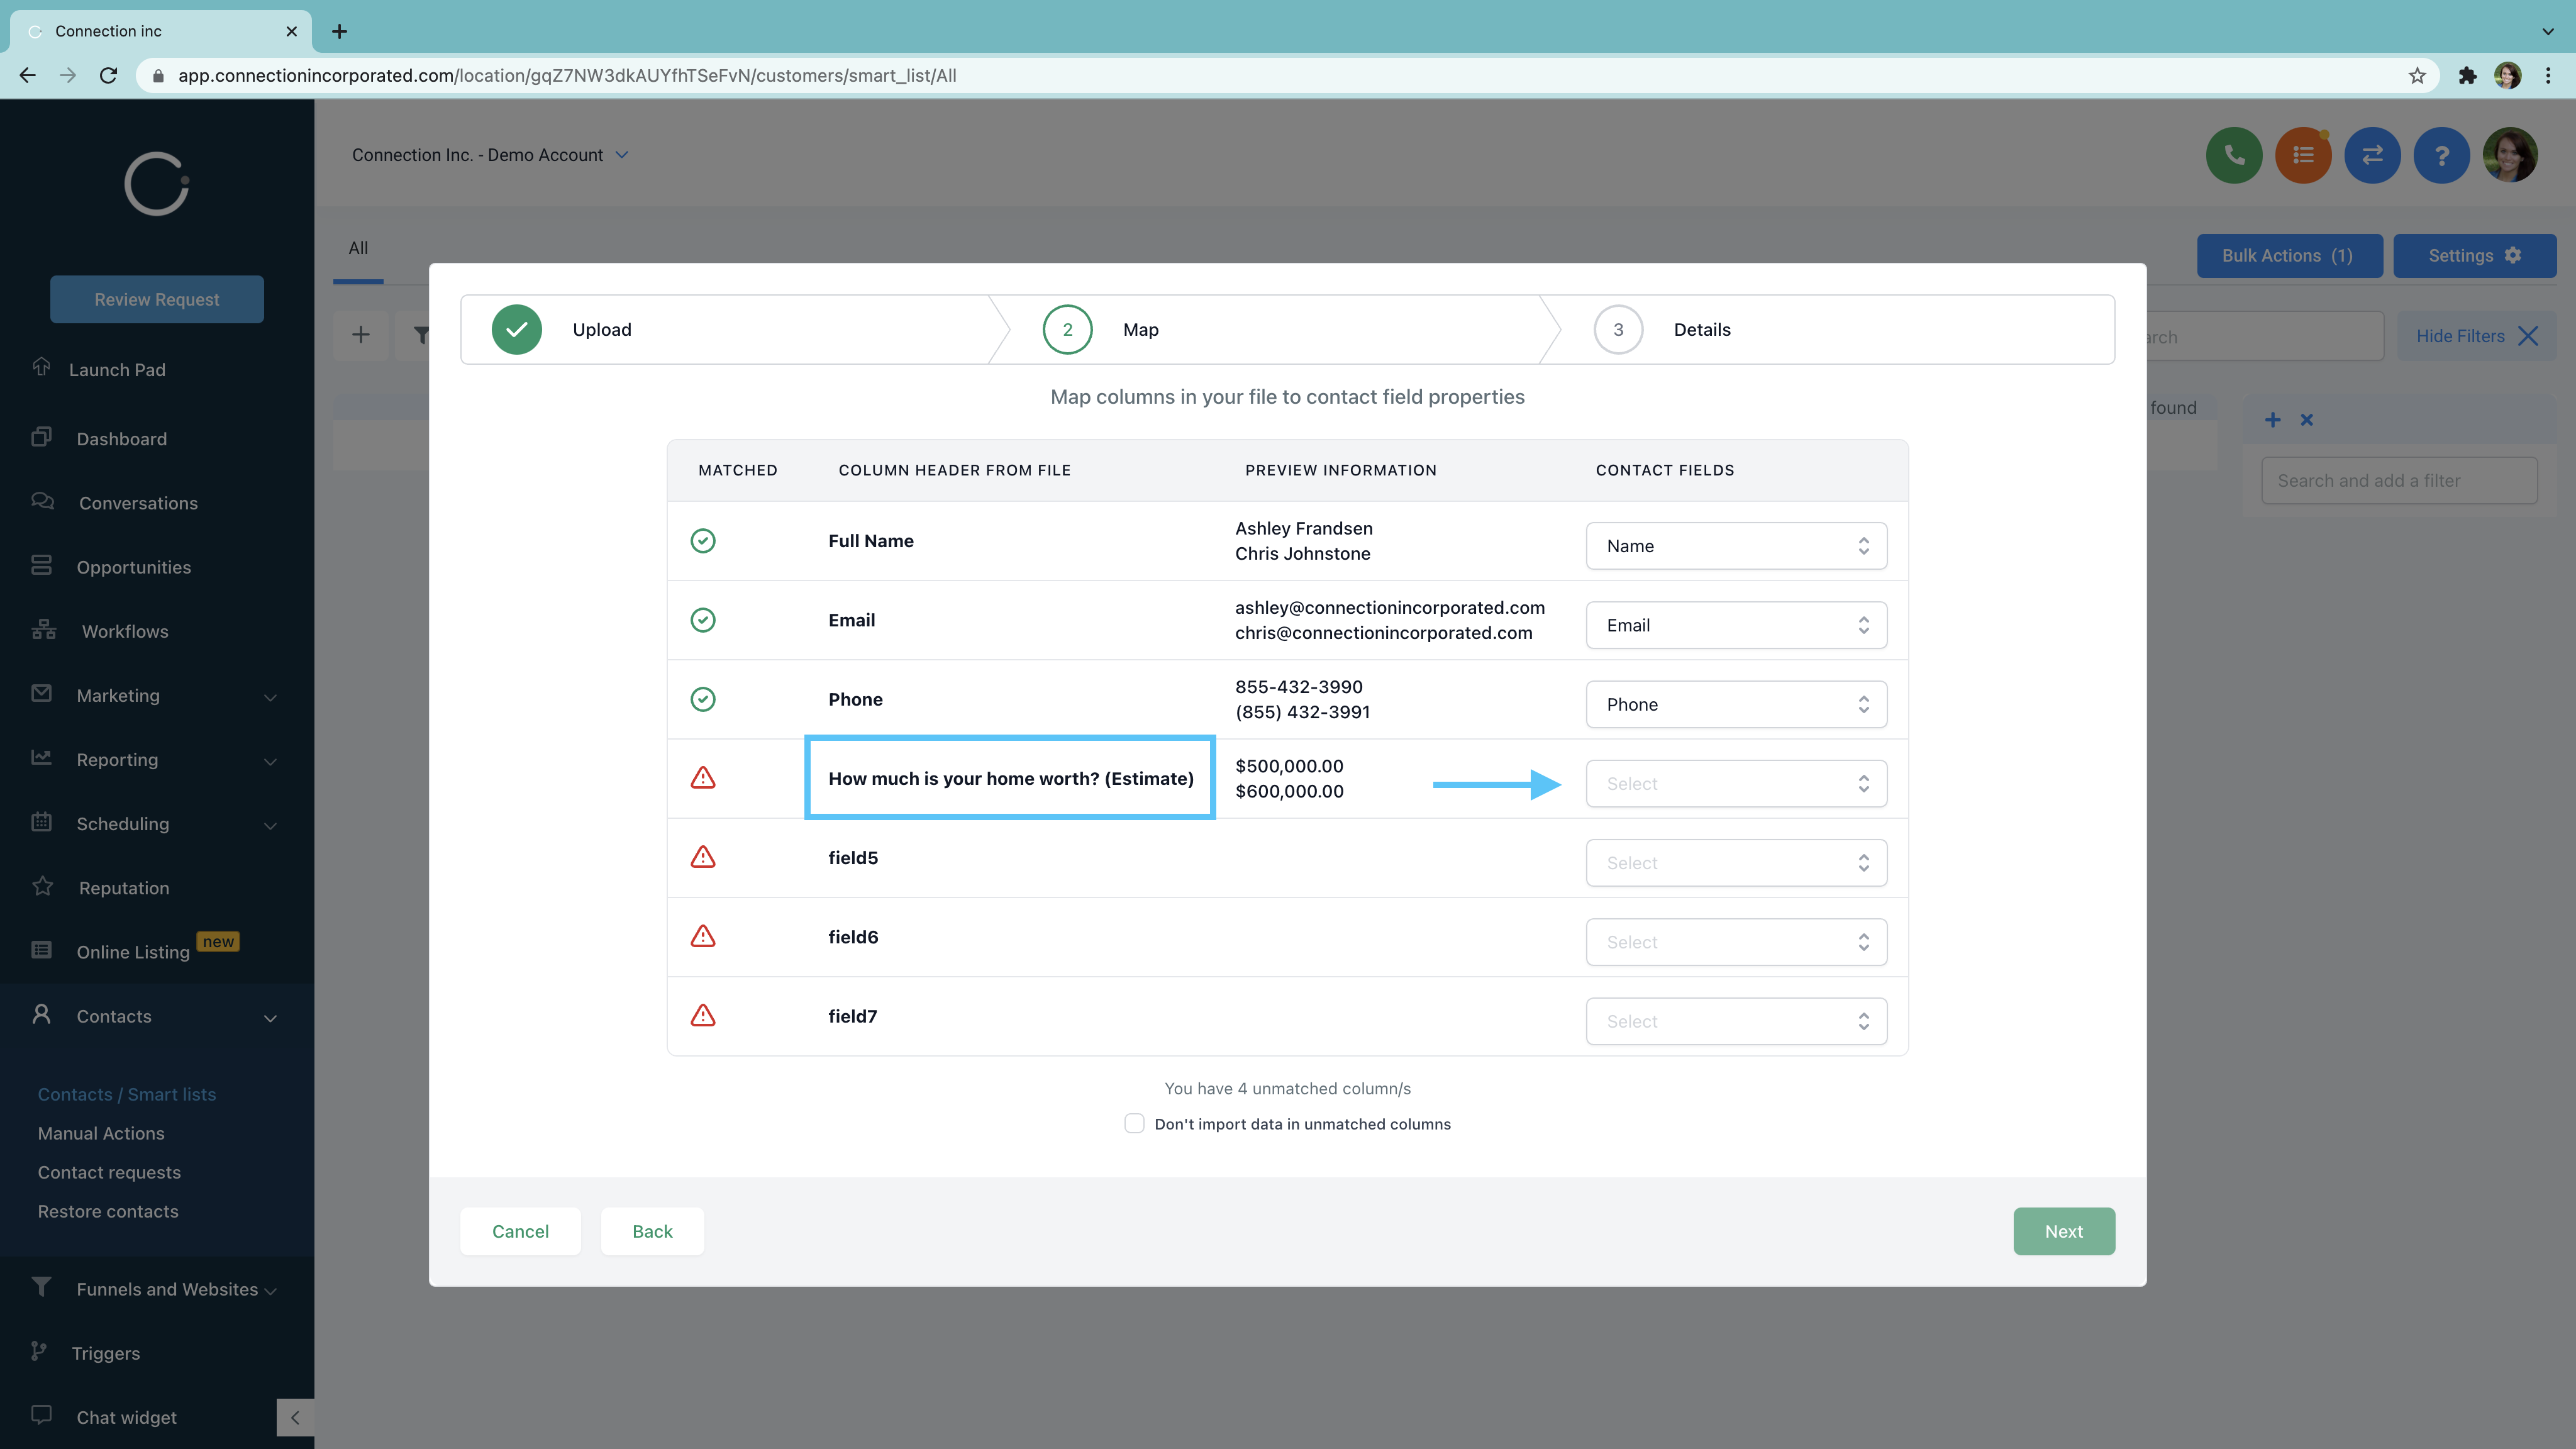
9. Once everything is mapped over confirm you have no empty fields. If you do (such as the example shown in the above and below screenshots), toggle on "Don't import data in unmatched columns."
10. Next

11. Import Name > By default, it will pull the current date and time. You are able to modify this if you choose.
12. What do you want to do with contact/s in the .csv file? > This is your duplicate strategy. Here is where you will select if you wish to add new and update existing contacts, add new contact records, or update existing contact records.
13. Find Existing Contacts Based On > This is in correlation to updating existing contact records
14. Tags > This applys a tag to all the contacts you are currently uploading
15. Add to Workflow/Campaigns > You have the option to automatically move these contacts into a Workflow/Campaign right as you are uploading contacts.
16. Submit

16. Congratulations! Your CSV File has been uploaded!

